checking in to a DR live event
As you get ready to attend your first Dystopia Rising Live event, the best thing you can do to get ready is to CHECK IN to the event. This lets our team know how many players to expect and lets you confirm a few logistics questions. Let’s walk through a step-by-step guide for using the new Juno Database to check in.
If this isn’t something you’ll be able to complete before the event, that’s fine. We can help you check in at the door when you arrive and you can even buy a ticket on site with cash or credit card.
Step 1: Access the Juno Database
First, make sure you have the right link! If you’ve been lurking for a while before your first game, a link was once circulated that is no longer active. Basically, if the word “staging” is in the link at all, it’s the wrong one. Check the URL on your browser to make sure, as this is the single most common error we’ve heard folks have encountered.
Here’s the correct link: https://db.larp.network/
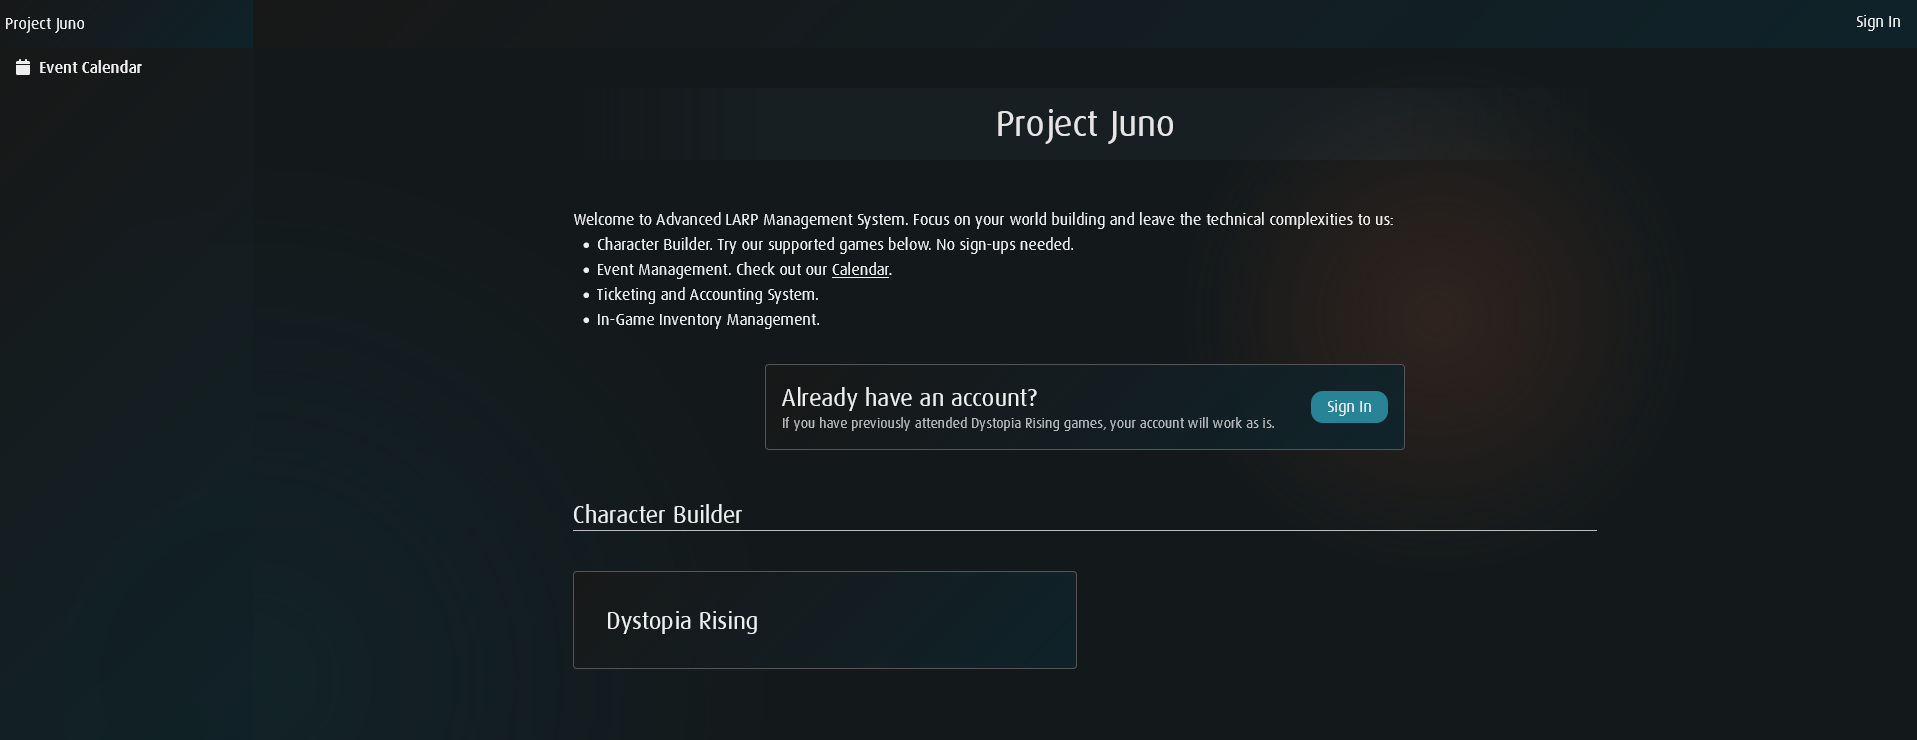
Here’s what the landing page should look like
Step 2: Click the “SIGN IN” button and log in
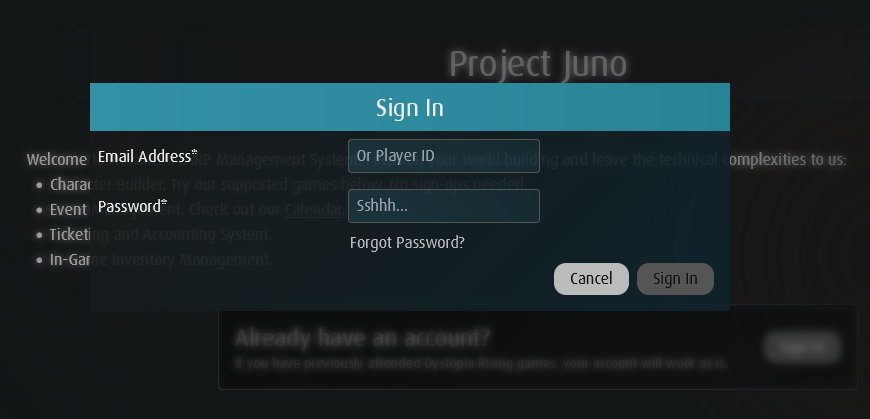
To start the process, let’s click the blue SIGN IN button. This will bring up the Sign Up box for your email address and password.
If you are a new player and this is your first game, then you will have an account created for you after you register using the ticket purchase system.
If you are a pre-existing player, and this is your first time using the new check-in system, then you may need to reset your password to log in.
If you are still unable to log-in, email us at info@dystopiarisingtx.com
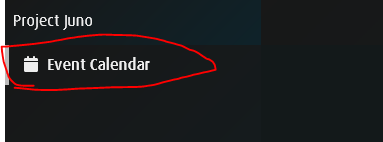
Step 3: Click the Event calendar link
After you’ve logged in, click on the EVENT CALENDAR tab on the left hand column of the page. This will open up the list of months with a drop down menu beside each one marked by a ‘down arrow’.
Step 4: access the Event
On the Event Calendar, you’ll need to click the ENTER symbol that shows up under the game you are checking into. Look for the next event labeled “TX”.
If the game is not yet ready for check-in, the name will be shaded in dark gray. Otherwise, it should appear in white.
If you haven’t logged in yet, the database will prompt you to do so at this point.

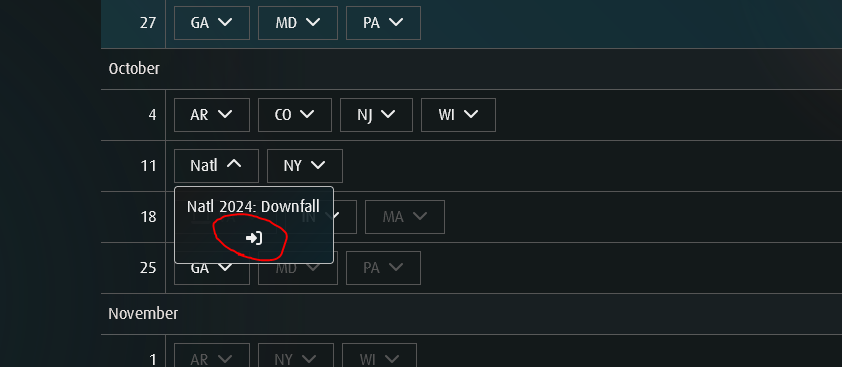
The symbol will look like an arrow pointing at a bracket.
Step 5: select your ticket type & EXTRA XP
Once you’ve accessed the event, you’ll see the description, dates, and location of the upcoming event at the top of the page, along with your name and player number.
TIP: Make sure you’ve selected the right event by checking the top of the page!
Select your ticket type. Choose the down arrow where it says “Select a Ticket” and it will show you several choices.
For most folks this will be “$100 Standard Casting [4H]”.
If you purchased a different type of ticket, select the appropriate option.
Choose the Extra XP you paid for. You’ll select the amount from 0-3 that you purchased for the event.
Remember, purchasing additional XP is a great way to support DR:TX in investing in better props and covering our costs for game.

Step 6: select your character
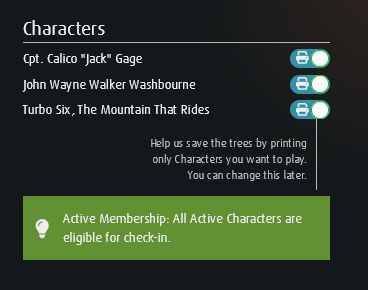
Select which character you want printed at the event. If you won’t be playing that character for that event, you can unselect the character on the right-hand column.
Every participant starts with a Basic Membership. You can create up to three different characters in the databse, but you can only play one character per event.
You will only earn XP for the one character you choose to play with a Basic Membership.
You can play as many characters as you like at an event with an Advanced Membership, which can be purchased through the network DR Live website. This also enables you to earn XP on all of your characters at once!
Step 7: select your casting & Cleanup Shift
Choose your Casting Shift and Cleanup Shift.
Each Casting Shift is broke into a 2-Hour Time, so for most normal tickets you’ll need to choose TWO (2) Casting Shift times. If you mess this up, we can fix it later during check-in, don’t worry!
You can split up the times if you prefer, but most players prefer to keep their shifts together.
At the end of each event, we work together to make sure the Girl Scout camp is left better than we found it. The final Clean Up Shift will largely be selected for you at game, but you can pick your preference here.

Middle of the check in page
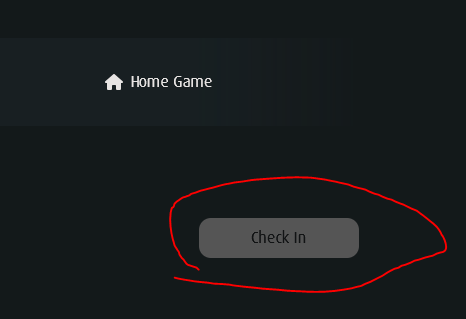
Step 7: click the check-in button at the bottom
Once you’ve completed all the selections, finish up the Check In.
Click the “Check-In” Button at the bottom of the page.
If you’ve successfully checked in, you’ll see the Event Calendar button change to PURPLE and display your earned XP.
You have successfully checked in for your next DR Live event!