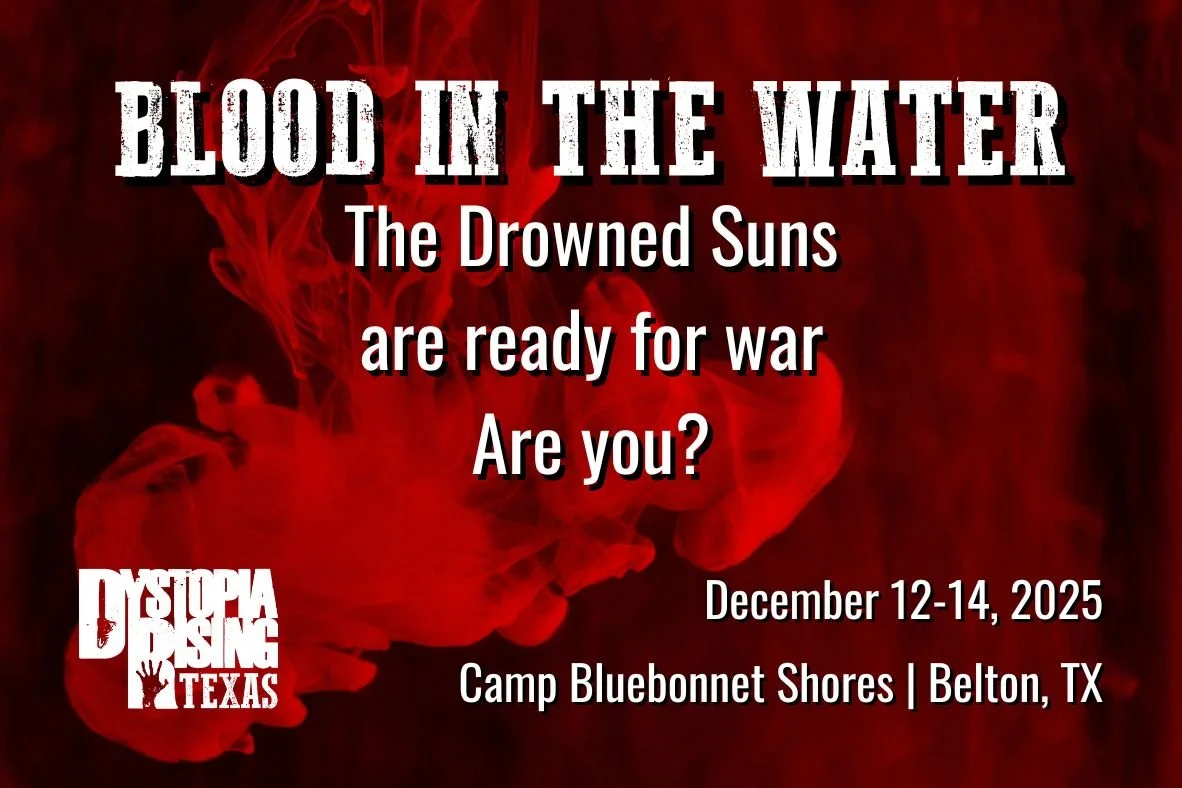
Rules You Should Know - December
Howdy Vados!
It’s Jonathan here with another signature DR:TX Rules Ramble, leading up to next premiere Dystopia Rising Live event BLOOD IN THE WATER! This game will be led by Krypto, Jonathan, and Fable. Each post, I’ll discuss in detail an aspect of the upcoming event, compiling the rules and lore into one easy place to read! This week, we are revealing the plans for the assault on Drywater by the Tri-City Alliance, and some Rules You Should Know for our December event!
TICKETS FOR OUR december premiere EVENT ARE ON SAle at the gate! Don’t miss your chance to save drywater!
December is a PREMIERE EVENT! Once each year you get the opportunity to purchase additional XP for your character, so this can be a great way to accelerate towards a new Skill, a Profession, or a new Lore. These extra funds can also help us invest in new props, new settings, and help us make this capstone event be a game to remember.
If you had a great experience at our last event THE MENAGERIE or had some suggestions for how we can improve, we’d love to hear from you! We appreciate your high-fives and suggestions and always want to seek ways to improve our events.
Fill out our Feedback Form!
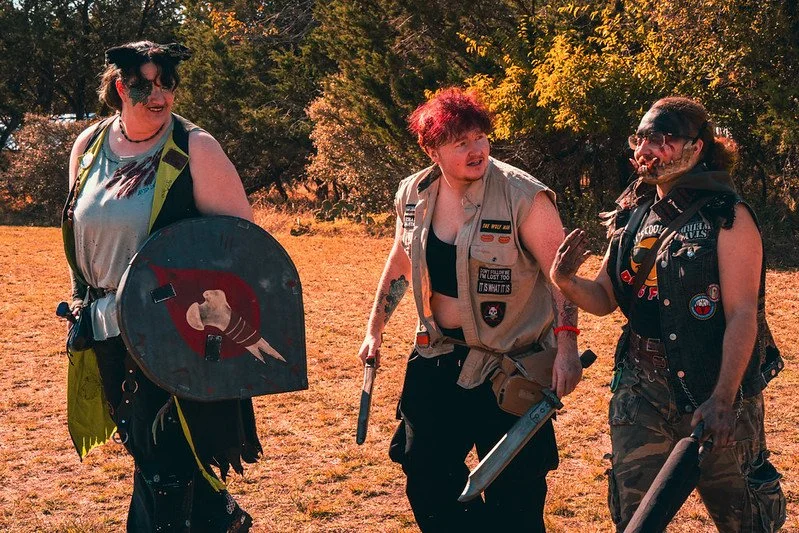
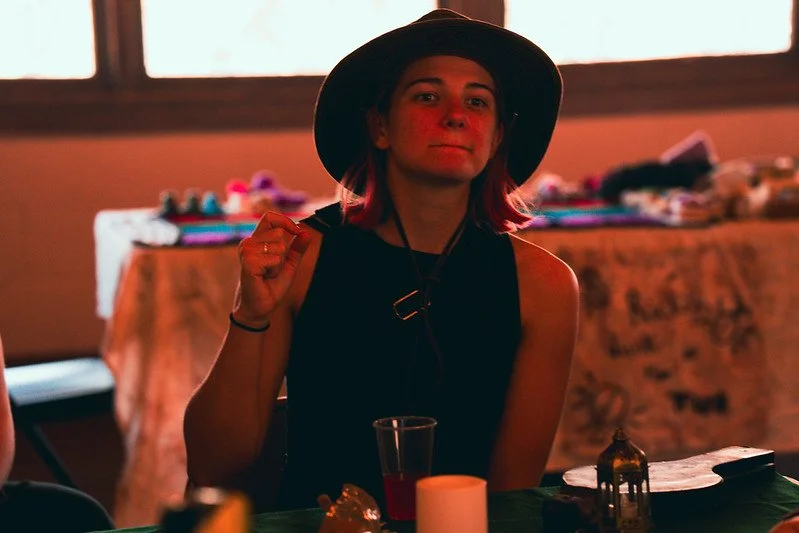
Our photos for this post were taken from previous DR:TX events by our talented Photo Team, including Lily-Jay Jones, Miranda Farmer, Heather Halstead, Noah Goodman, and Max Pohlmeier.
The Battle of Drywater
As we’ve discussed in previous blog posts, a big feature of this next event is going to involve Bravado helping their allies to the west reclaim their home from the terrible Drowned Sun pirates. This is an attack with a lot of moving pieces, involving allies in the Junkerpunks, the RRC, Bastion and the Mustang Loyalists, and elite strike teams led by Bravado’s finest. While a bit of this is kind of ‘in-game’ information, we wanted to spoil our battle plan so you can better plan out your weekend events.
Here’s the map of the Drywater Assault Plans that will be shared with the town on Friday night. This is the general strategy of the Junkerpunks as they deal with the tricks and traps that Margeaux and her deadly lieutenants undoubtedly have in store. In game, you’ll need to protect this information from Drowned Sun agents hoping to get a heads up of how to best resist the attack, but for now we are declassifying for your eyes only.

Drywater Assaults and Morgue Dives
Battle in the post-apocalypse is a bit smaller in scale than real life. In a world where you can return from the dead to fight again and again, “armies” are groups of dozens of folks, not thousands. Think small skirmishes, not world war. Bringing too many people together in one place tends to attract devastating amounts of the undead, so most settlements stay pretty small in the wasteland, even when it erupts into all-out violence like this. Drywater is a bit larger than Bravado, but it’s no major city like Essex or Bastion. The soldiers of the Junkerpunk navy and Peacekeeper forces is some 200-ish survivors strong, so this makes the attack on Drywater the largest force the San Saba has seen since the last war. Think of this as less than a mass military invasion and more small groups of organized survivors fighting block-to-block against disorganized foes.
From a narrative perspective, the Battle of Drywater is going to happen on three different fronts in game:
The Main Advance - This is the off-camera attack on Drywater, led by Sinker Swim, the Gils, and General Mustang. These events will happen in a mostly scripted manner (though we still have a few surprises in store). The southern approach to Drywater is guarded by some nasty scrap cannon turrets, so before they can advance the Junkerpunk fleet to engage the Drowned Suns in the Drywater Cove, they need to secure some ground first.
Starting on Friday night, the Main Advance will lead the main attack to secure a landing zone for future operations on the east shores of Drywater, enduring withering attacks from the Drowned Sun as they make sure that the Bravado Strike Teams will have an escort into the town. From there, the focus will be on keeping the main Drowned Sun forces occupied. They have a few plans to lay siege to the Black Keep and land elite Mustang Loyalist teams to secure the high ground and keep Margeaux trapped and under fire.
Saturday evening, the primary battle for Drywater will commence. The Junkerpunk fleet will advance on the Cove, engaging the Drowned Sun ships and landing soldiers to attack the main pirate forces at the Black Keep. They plan to coordinate the attack with disruptive attacks at the docks to prevent the Drowned Sun pirates from simply escaping onto land, and then join their allies for the final fight late Saturday night. This will be our climatic fight of the weekend, so expect some deadly enemies and a chance to deal with the Drowned Sun leadership once and for all.
Morgue Dives - The Grave Council is leading a dedicated team of hell divers to secure the Drywater morgue and take a stock of exactly how bad the corruption in Drywater has become. Led by Verim, the Vaultkeeper and his loyal Reckoner Duty-Upon-The-Dias, the dives will delve into the Mortis Amaranthine in search of a way to seal off the corruption for good. These runs will be high intensity, small group missions into the Grave Mind in short bursts. Stay too long inside, and you could risk death or worse. You’ll have a few objectives to complete under duress, as you learn more about the morgue underneath Drywater.
Friday night, the Vault Keeper will help your characters enter into the liminal space of the morgue with Necrokinetics. More scouting mission than a true Corrupted Morgue Dive, you’ll have to still deal with some terrible threats. While you may be intangible inside the morgue, you won’t be the only ones within the Mortis Amaranthine. If these slow but deadly undead threats reach you, they will inflict damage on your RESOLVE, not body. Lose all your Resolve and you’ll be kicked out of the morgue, leaving your friends in danger inside. If you succeed, you’ll have a chance of improving your odds once you descend into hell itself.
Saturday night, once you’ve secured a placement for your Lancing Caskets, you’ll descend into the belly of the beast. Within the morgue you can expect to encounter the terrible Wahel Dead, powerful proto-zombies that can absorb almost any attack used against them, save for priceless Necrology equipment that can inflict Wahel Bane. You’ll need to hold territory and move deeper into the morgue to place a necrological bomb. As you dive into the fleshy pits of hell, you’ll need to purge the corruption and find the origin of the corruption. If you can arm the bomb successfully, you’ll be able to seal off the corrupted morgue for good. However, if you stay in the corrupted morgue for longer than 5 minutes, you’ll face sudden death and be devoured by the corrupted undead. You’ll need to organize your teams to quickly and efficiently solve puzzles before the time runs out, taking turns braving the Corruption underneath Drywater.
Drywater Assaults - Bravado will be doing their part to liberate Drywater by sending their very best — YOU! During these runs, your strike teams will strike into Drywater and have a chance to fight Drowned Sun face NPCs, accomplish objectives while battling against pirates and undead, and try your best to evacuate civilians and rally the rebels that are within the city to your cause. If you are successful, you’ll be able to pave the way for the Junkerpunk forces to arrive safely into Drywater for the final assault Saturday night.
You’ll need to break through barricades, plant beacons to mark priority targets for an air strike, and kill dangerous Drowned Sun pirates before being needing to evacuate back to your ships and the staging grounds. Each mission will involve a few different objectives that must be finished before falling back. You’ll be able to take turns leading the charge into battle, so our hope is to let anyone interested have a part to play in the battles ahead!
The Schedule of the Assault
Here’s a list of the times that your characters will be able to join a Drywater Assault or Morgue Dive in person, and help swing the tide of the Battle of Drywater in your favor:
Late Friday Night/Saturday Morning, 0100 - Drywater Assault
Early Saturday, 0230 - Friday Night Morgue Dive
Saturday Morning, 1130 - Drywater Assault
Saturday Morning, 1230 - Drywater Assault
Saturday Evening, 1800 - Drywater Assault
Saturday Evening, 2100 - Drywater Assault
Saturday Evening, 2200 - Drywater Assault
Saturday Evening, 2300 - Corrupted Morgue Dive
Final Fight, Late Saturday/Sunday, 0030 - The final attack on the Black Keep and dealing with Margeaux for good!
We hope this will help you plan your in-game events around these mods and allow you to attend at least one of them during the weekend. Rest assured that we will still have plenty of zombies, raiders, and critters to keep things interesting in Bravado, even if you choose not to get involved!

Rules You Should Know - BLOOD IN THE WATER
In Rules Ramble tradition, let’s cover some of the rules you should expect to encounter during our December event. I’ll try to include page numbers and books where relevant, but I’ll also try to provide some context and information I think you’ll find useful at game. Our main threats this weekend will involve the Undead and the various forces of the Drowned Sun Pirates!
Let’s cover the ‘surface’ level threats first:
REMEMBER:
The NPCs in Drywater will offer NO QUARTER. The Drowned Sun have prepared as much as they can for the assault and though they may be outnumbered, they aren’t afraid to fight dirty. The pirates are intelligent threats, and can lie, cheat, steal, and murder their way to victory, so you should be very careful when fighting the Drowned Sun. They can and will execute their prisoners, steal valuable items and brass, and use every CVC trick in the book to work against your efforts. You may even find your local resources under attack if you don’t respond in time. You should consider every Drowned Sun to be KILLING BLOW ACTIVE during a mission in Drywater, so be warned!
Knockout (Player’s Guide, p. 37)
This skill allows an individual to call “Knockout” and, after landing a successful Strike with a brawler to a Target’s back torso (no other means), render the Target Unconscious. The Target remains Unconscious for 5 minutes or until they take any damage, experience any form of mechanical effect (after the Knockout is complete), or are roused by someone role-playing for at least 30 seconds to wake them.
Countered by Avoid: This skill can be negated by Avoid.
Unconscious State: The Target remains Unconscious for 5 minutes unless damaged or affected by another mechanic.
Rousing Role-Play: Another player can rouse the Target with at least 30 seconds of Full Engagement Role-Play to wake them.
This can be a brutal ability, as it’s very challenging to save yourself if you don’t manage to avoid the strike, packet, or area of effect.
In most cases, this is an attack delivered by a brawler, so remember to save an Avoid! (or maybe a helpful piece of personal jewelry.) If the attack lands, you’ll need a nearby friend to save you.
This is a great skill to use to capture a player… um, I mean, a target with things like Binds or other dangerous abilities. When you are Unconscious, you can’t stop folks from looting your gear or carrying you away, applying dangerous effects to you, or tying you up with the Lockpicking & Security skill (p. 46, Player’s Guide).
The effects of a Gleaming Red Byproduct can make you immune to Knockout, if you use it before the attack is called.
Overwhelm (Player’s Guide, p. 86)
An attack or effect needs to be defended against twice to prevent the effect from occurring. Example: “Mangle - Overwhelm” would require 2 uses of Avoid to prevent. “Psionic Mangle (Limb) - Overwhelm.” would require 2 uses of Mental Endurance to prevent.
Certain powerful strikes can be hard to prevent, even if you are quick on your feet. When you hear the modifier OVERWHELM, you’ll have to defend TWICE. These attacks are hard to stop, and as a battle drags on and Impact Skills run low, these attacks will be especially deadly. However, remember that Overwhelm attacks still need to connect with a target in order to take the effect!
Murder -- Target Both
With this skill, an individual may call “20 Body, Murder” and land a single Strike with a Melee Small or Ranged Attack to the torso. If successful, and if this strike causes the Target to fall into Bleed Out, the Target skips their Bleed Out count and is considered to have instantly received a Killing Blow.
Countered by Avoid: This skill can be negated by Avoid.
No Vitals to Stab: Most Zombies are immune to Murder.
Let’s cover a few important notes here. This is a skill that’s on a few different enemy raider, critter, and zed threats as well as being the signature ability of the Assassin Impact Skill Profession. This profession is based of off the Impact Skills Blinding and Piercing Strike, so you can generally expect a foe that can use this skill to have those abilities as well. You can also see this skill on a few deadly TRAPS as well.
Murder can only be delivered by certain weapons and traps. If it’s not a critter or zed, your enemy is gonna have to use specific equipment to use this skill. If the person is using a giant weapon, this is probably not a skill you’ll need to worry about. (Well, mostly…)
Most zombies are immune. Murder is mainly useful against living threats. Save it for your fellow survivors, critters, or raiders that aren’t in Raider Rage.
This attack is armor piercing. Murder deals Body damage, so this ignores any points of Armor the target may have. This makes this very effective against armored opponents and it makes it an excellent finishing blow after dealing some initial damage in the fight. Most assassins won’t lead with this attack, but will save it for an opportune moment when you can’t easily defend.'
It must be a fatal blow to count as a Killing Blow. If the 20 damage included in the strike as part of this ability isn’t enough to knock them into bleed out, then the Murder effect doesn’t trigger. It may take multiple uses of Murder to kill a particularly tough target with a lot of Body.
You need to be precise. The easiest way to escape a Murder call is if the attack contacts a weapon or shield first, or hits another part of your body other than the torso. This attack needs to hit a vital spot in order to work, so no, you can’t murder someone by striking their foot.
This is an attack that can (and should!) be prevented with Avoid. This means all of the items that work with Avoid are useful here, such as the Daline Go-With-the-Flow or even the armor ability of the Counterbalance Rigging. This is mostly used a finishing blow, so remember that a target in Bleed Out can’t really prevent this effect.
Master Faithful Miracles can stop this effect. Because the Murder call is functionally a Killing Blow, this is one of the few non-equipment means to stop the instant death attack. The Killing Blow will trigger the Knockback effect of the buff, so make sure you have a plan to get away once it goes off.
Proficient Biokinesis can DELAY the effect, but not prevent it. This is one of the skills that can be slowed down by the delaying effect, but you’ll take all the Murder calls 30 minutes later and they can’t be prevented. Murder is especially deadly if someone is using this ability.
This is an instant Killing Blow. This is probably one of the most useful parts of this ability. Because it is a much quicker deadly strike than a simple three-count Killing Blow, Murder prevents the target from using injectables or other quick healing to bounce back.
There’s a few pieces of crafted equipment that can modify this skill even further.
Brain Shudder Blade - This is a particularly deadly blade, stopping most means of preventing Infection loss. This is a powerful combination with the Murder skill.
Steel Main Gauche ‘Blade’ - This item lets you spend a use of Murder to call two smaller hits of Murder instead. This is great for dealing with multiple weaker threats, or quickly finishing off a downed victim.
Striker’s Coat - This is the only item that specifically stops Murder, but it costs Resolve and requires you to be in Murder Inc. It’s a powerful item, but a bit more restrictive to use in the new world of DR Live.
As you can tell, this is a very deadly ability in the hands of an Assassin. Let’s cover the bane of Assassins next, the terrifying ability that can let you NAIL someone in place - DEATH STALK.
Death Stalk -- Target Both (simultaneous)
With this skill, the user becomes a master of singling out a Target for pain. To activate, the user points at a Target while saying “Death Stalk, Nail” and ignores the first 20 seconds’ worth of strikes and effects while stalking toward the Target.
Movement Restrictions: The user must walk directly toward the Target, who must be no more than 15 strides away. The user cannot deviate, attack, or use any other skills while moving toward the Target.
Strike Requirement: Once the user reaches the Target, they must strike the Target. After this, the user begins taking damage and skill effects as per normal.
Immunity After Strike: For 3 seconds after the initial strike, the user is immune to skills that Target them.
Countered by Rescue: This skill is countered if another character uses Rescue on the Nailed Target.
This ability is seen on a few threats and while it may seem innocuous at first, it is one of the more powerful Profession abilities in the game. The NAIL ability is a hard counter to a number of popular abilities, so this can quickly turn a fight against you.
Nail lasts for 1 minute. Unlike some items, the skill itself doesn’t specific a time limit here so defaults to the base time for the keyword ability. You can find the Keyword for Nail in the back of the Player’s Guide on page 88. A minute is an eternity in a fight, and often when this ability is used the fight has already been decided.
Nail counters most movement abilities, including Never Here, Enhanced Movement, or Agile Movement. This is a recent change, but Nail is a hard counter for most of the common escape abilities. This means that Death Stalk is incredibly effective against sneaky enemies as it removes their ability to quickly get away from the fight.
Unlike the Grapple ability of Ground & Pound, this Nail effect is not ended by forced movement. This means that an unmodified use of Psychic Propulsion won’t end the Nail, and you can’t be moved from the spot until the condition ends. You’ll need some outside help or crafted equipment to do so. It does mean the target hit by the Nail effect can’t be moved by Knockback effects, which could be useful in some cheeky situations.
While the Reaper is moving towards their target, they are immune to damage and skills. This protection lasts for 20 seconds of moving towards the target, followed by 3 seconds of immunity after the strike. This can be deceptively powerful, as they can’t be stunned, knocked back, or really slowed down while they are pursuing their target. There are even some items that increase the damage of that initial strike, and it’s a great time to use dangerous skills like Mangle or Murder.
There are very few ways to remove Nail once it’s been applied. The primary way to save a friend targeted by a Reaper is to have a Combat Medic nearby with Rescue, or find a way to forcefully move them. This ability is the primary counter to Death Stalk, as it can break the Nail effect and get your friend to safety. The only other notable way to end the effect is the Feedback Loop Generator.
There are a few pieces of equipment that can interact with Death Stalk.
Claymore Vest Armor - This armor can be useful when targeted by some Nail effects, as it triggers a Knockback 10 effect. This is most useful against the Ground & Pound skill, not Death Stalk. This armor doesn’t actually stop the Nail ability delivered by Death Stalk, as the skill protects you from effects while you approach your target.
Feedback Loop Generator - This is one of the few non-Rescue ways to end a Nail effect, using the Psychic Propulsion impact skill. It only has one use, but it is an AOE ability so you can break the Nail effects for your nearby friends (or enemies).
Subcutaneous Magnifier - This item also breaks Nail, but uses the Telekinesis ability. It’s only single target, but you can get 5 uses from the item before it is expended.
There are some other ways to notably get the NAIL effect, including the Ground & Pound ability of the Shock Trooper profession (and most zombies) and certain items like Glue Moon Arrows or Toothpiq Throwing Spikes. While Death Stalk is probably the most flashy way to get this effect, it’s not the only way to slow down a would-be assassin.

Threats within the Mortis
For those unfortunate few that brave the Morgue Dives within Drywater, you’ll encounter some new challenges. If you are unlucky enough to die while on a Drywater Assault, you could even encounter a few of these challenges during your Grave Mind scene.
First, let’s make sure you understand between being inside the Mortis, and being inside a Corrupted Morgue:
The Morgue & the Mortis
The Morgue is separated into two sections - the “physical” space of the Morgue and where folks wait for their loved ones to return, and the “liminal” space of the Mortis Amaranthine, where you experience a Grave Mind Scene.
In general, there are few methods of entry into the Mortis Amaranthine:
Basic Necrokinetics - Only usable during a post-death scene. 5 Mind points for 5 minutes, can add 5 minutes for 5 Mind once. This allows you to invisibly observe a post-death scene, but you may not interact with the environment, make noises, or move from your position. You should use the “Invisible/Stealth” hand signal while inside.
Proficient Necrokinetics - Does not require a post-death scene. You can spend 10 Mind points to enter the liminal space and take a second willing Target with you, for 30 minutes. You can extend this time by 10 minutes for 10 Mind (for a total of 40 minutes). You are intangible to the outside world, and can only interact with others in this same state.
Necrology Station (Blueprint) - In a Morgue that has a Necrology Station installed, any character may expend 1 Resolve to enter the Mortis space and take a second willing Target with them. They may remain in this space for 30 minutes before being expelled back into the Morgue.
In general, characters within the Mortis have the following limitations:
Intangibility: Characters in the Mortis Amaranthine are intangible to the outside world and can only interact with each other. If a Morgue dive takes place near a corrupted morgue, you may have a silver thread tying you back to the entrance.
Observation: Characters are actively aware of anyone entering the Morgue space (such as grave divers or newly deceased characters). If someone (or something!) else shows up, you’ll be aware of the intrusion.
Equipment Use: While in the Mortis Amaranthine, the characters may use equipment specific to Necrology that requires being in the Mortis Amaranthine for activation. This includes a variety of mechanical effects, such as Necrology Experiments, Necrology Procedures, and Mortis-related plot mechanics.
Liminal Threats & Resolve Damage: Some enemies can exist in the liminal space, particularly if a nearby Morgue is corrupted. When these threats connect with a boffer or hit your silver thread, they inflict Resolve damage instead of physical damage. If you lose your last Resolve while in the liminal space, you will be immediately shunted back to reality and gain one Fracture. If the threat is in a death scene, this instead inflicts two (2) Fractures upon reaching zero Resolve.
Dying near a Corrupted Morgue: There have been many reports of the Wahel Dead existing within the liminal space of the Grave Mind scene after death. Instead of the usual black box scene, you may face one of these terrible threats that slowly approaches you during the scene. If it reaches you, it will attack. You’ll need to make a decision to either face the threat or try to exit the Mortis. For the dead survivor, this is the only time you can hurt a Wahel without special equipment. If you manage to kill the undead, you can reduce the danger in the next Grave Dive, otherwise you suffer additional Fractures upon “dying” in the Grave Mind scene. If there happens to be someone watching your death scene intangibly they can help protect you from these corrupted Wahel.
Corrupted morgues
When a Morgue becomes Corrupted, the space within becomes hellish and deadly. You can read about this in the DR Live book The Grave Divers. If the Morgue Space is Corrupted, the only method of entry into the liminal space is Necrology equipment. While inside, you can only remain for a period of 5 minutes.
These items allow you to physically enter the liminal space of the Mortis Amaranthine:
Lancing Casket - The item allows the user to drop into a Corrupted Morgue Space for 5 minutes. Each use allows one person to enter.
Blue Hue Goo - This expendable item allows you to start in a location of your choice once you’ve used a Casket to enter the Corrupted Morgue Space.
Inside the Corrupted Morgue Space, the following applies:
No Escape: You may not use skills like Never Here to leave a Corrupted Morgue. The only way to exit the Morgue is the way you came in, or other specialized Necrology equipment.
Equipment Use: Necrology Items consume one “use” for each complete grave dive, regardless of how long you remain in the Corrupted Morgue. These items are commonly weapons, armor, and gizmos that help fight the Wahel, though most other items function as normal.
Wahel Bane: Zombies in a Corrupted Morgue are completely immune to damage that does not include the “Wahel Bane” call, and are immune to many skills. Wahel Bane damage deals normal weapon damage to creatures with Wahel Resistances.
Limited Exits: You may only leave a Corrupted Morgue Space through the grave arch during the set 5 minute time limit. Exiting outside of this time requires Necrology equipment like the Bio Stabilizer Injection System or being forcibly expelled by the Mortis.
Corrupted Morgues can only be closed for good with a Helscape Catastrophic Stabilizer. This device takes 30 minutes to arm and will require multiple grave dives to activate.
The Guide overseeing the grave dive will loudly call out time remaining for the run, starting after 30 seconds. Once 5 minutes has elapsed, the grave dive will end whether the players are ready or not.
If an individual does not use equipment or get to the safe exit before the timer runs out, then they must stay within the Corrupted Morgue for one “survival minute” more until the Mortis expels them from the space. During this time, they need to fight off Wahel and if they have any Injections or other means to escape, they may.
If at the end of the 1 “survival minute” they have not escaped they will be ejected by force losing one Resolve, and receive one Fracture. If they do not have the Resolve to spend or already have one Fracture, then they lose 1 Infection and receive a hellish Mortis Scene.
Wahel Dead
These dangerous threats are virtually unknown outside of a Corrupted Morgue Space. When they gestate enough within a Corrupted Morgue, each can burst free of the Mortis as a swarm of 20-50 ferocious Gore Hounds. As such, it’s in your best interest to deal with them while they are within the Mortis and hopefully prevent them from escaping. Sometimes, an escaped Wahel can become something even worse…
These threats are still pretty new across the wasteland. As such, there’s not a lot of concrete evidence about how they operate (unless you read the spoilers in the Grave Divers book, of course). Here’s a spoiler-free look at some things to expect with the Mortis.
Wahel are known to exist in different sizes and dangers of threats, much like common zombies. Wahel are constantly mutating, ranging in threats from the dangerous to apocalyptic. Alpha Wahel are the most common variety, with the terrible Lumbering Wahel being some of the worst things within a Corrupted Space.
In the corrupted morgue, the Wahel take massively reduced damage from tools that are not specifically designed for this environment. Explosions that would typically obliterate a cluster of zombies result in little more than minor injuries. Melee weapons, regardless of the quality or the user’s skill, barely scratch the surface. Standard firearms, too, which are often the backbone of a survivor’s arsenal, deliver only superficial wounds, insufficient to halt the relentless assault of the Wahel.
Wahel Resistances reduce all damage dealt with non-Wahel Bane to ZERO. There is no way to damage them save for Necrology equipment. Wahel Bane equipment deals normal damage to a Wahel Dead, not double damage.
The mutated bodies of the Wahel make them mostly immune to common crowd-control skills. In some strange cases, these attacks can provoke a dangerous Abberant Mutation, making the Wahel even worse. When these abilities trigger a violent mutation, they Wahel can suddenly heal, break into a violent rage, or even damage the Mortis itself, reducing your remaining time on the Grave Dive.
Abberant Resonance - Wahel are made of the stuff that powers all psionics in the wasteland. They have a violent reaction when exposed to psionics, reflecting and magnifying the effects back upon the users. Psionics are incredibly dangerous to use within the sight of the Wahel.
Wahel are not the only threats within a Corrupted Morgue, as some species of Critters have been found recently within the Mortis. These threats exhibit dangerous psionic abilities normally unseen within their type.
Scary! Let’s hope you are ready for the descent into the place of nightmares!
WRAP UP
That’s it for today, Vados.
We hope that you will come join us for our next event, BLOOD IN THE WATER. The liberation of Drywater is here, and it’ll be up to you to help save your neighbor from the deadly pirates of the Drowned Sun. Will you get a chance to face one of Margeaux’s crew on the battlefield? Will you find a way to stop the insidious corruption that lurks within the morgues of Drywater? Will you survive your grave dive into a corrupted morgue and evade the ruthless WAHEL? Will you make sure that the BLOOD IN THE WATER belongs to the Drowned Sun and not you and your friends? Let’s find out together!
See you soon, Vados!